

1
Drawing in Procreate
Learn the basics of flow, balance, and botanical structure.
We’ll explore how to draw leaves, florals, and natural textures, and how to build an organic composition step by step.
This video is all about developing your eye for movement and harmony — the foundation for any freehand work.
2
Freehand on Skin
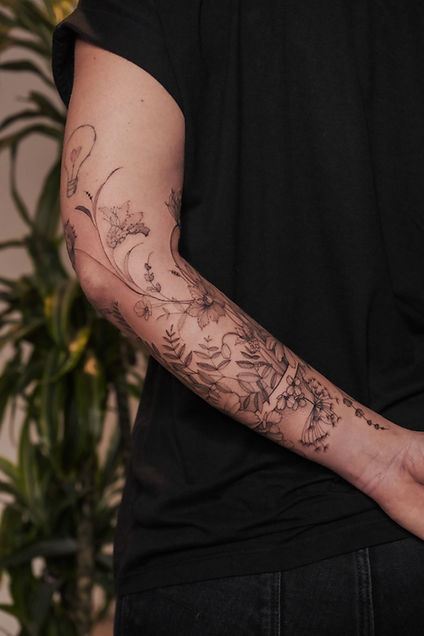
Here I show the complete on-skin drawing process — from planning shapes and following body anatomy to creating natural movement, adding details, and building depth. You’ll learn how to draw directly on the body, understand proportions, and make your composition feel alive and connected to the person’s shape.
3
Tattoo Process
A full close-up look at my tattooing technique. We’ll go through outlines, shading, contrast, and needle control, with real-time footage and detailed explanations. I’ll also share my personal tricks, practice tips, and the structure I follow in every tattoo — to help you gain confidence and refine your own approach.
01
Drawing in Procreate
In this video, we practice drawing botanical elements.
You can use Procreate or simply draw in a sketchbook.
The most important thing here is practice — draw, explore, and build confidence. 🌿
02
Freehand
In this video, you’ll see my freehand process and how I build the composition on the skin.
I work with Sharpie markers. I usually start with yellow to build the composition, add details with red, and sometimes enhance the design with blue.
If you’re not fully confident yet, start with yellow and red first. Add blue only when you’re sure, because it’s strong and harder to remove.
Also, don’t force your hand to work “in the air.” If it’s shaking, rest it on a table or another surface for stability.
And remember — anatomy is key. Train smart, and let the body flow guide your design. 🖤
03
TATTOO
I work with Mast Pro 2 ,0403RL or EZ Tattoo, 0803-0603RL as well.
I also want to explain how often I change the needle.
In this specific work, I didn’t change the needle because it didn’t get dull — the piece was quite small. However, sometimes, if a client has very rough or resistant skin, the needle can become blunt faster. Still, I don’t change it immediately as long as it can still be cleaned.
How do I clean the needle?
I remove the cartridge from the machine and, wearing gloves of course, I carefully clean the needle with my fingers, removing all the buildup and residue that remains on it. Then I place it back — and it’s good to go again. In this particular session, I didn’t need to do that, but sometimes I do, sometimes I don’t. It’s very individual.
About voltage: I work between 5.5 and 7 volts. For shading, I usually stay around 6.5.
My machine is Flux Max.
And one more important thing — I always apply Vaseline on the skin. This is essential.
I also don’t use grey wash. I use Pantera black ink and constantly dip the needle into water — ink, water, ink, water. This is how I mix and create soft half-tones.
That’s basically everything. Simple, effective, and battle-tested. 🖤
Thank you so much for watching this course.
I hope it was helpful and inspiring for your artistic journey. 🖤